User Guide
Here you'll find information to help you quickly master character creation with Gobane Composer. If anyone is up for creating a video tutorial for the program, I'd be happy to add the video to this page.
-
How to use Gobane Composer to create characters?
How do I change directories?
How to edit a sprite's color?
How to Crop a Sprite?
We're excited that Gobane Composer gives you access to the fantastic, free LPC sprites! These are a great resource for your projects. However, it's important to understand that while they are free to use, they are not public domain and come with specific licensing terms. To ensure you are using them correctly, please take a moment to review the comprehensive guide we've prepared for you: "An Amateur Game Dev's Guide to Liberated Pixel Cup (LPC) Sprites."
How to use Gobane Composer to create characters?
Using Gobane Composer to create characters is quite simple. To start, you can use the LPC sprites included with the application. To do this, follow these steps.

Step 1:
Begin by selecting an image in the image browser.
Step 2:
Click the "Import Image" button.
Step 3:
The program will prompt you to set up the base layer. The app configures it automatically, but sometimes it's necessary to do it manually.
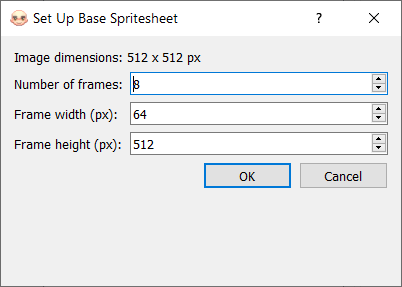
Step 4:
Repeat the process and keep adding layers and customizing your character.
Step 5:
Use the delete, move up, and move down buttons to adjust your character layers.
Step 6:
When you finish creating your character, go to the "File" menu and click "Save spritesheet (.png)" to save your character's spritesheet. The spritesheet will be saved in the "_My_sprites" folder if you don't change the path. You can also save it as a .ssg project if you want to modify your sprite later.
How do I change directories?
If you want to use sprites other than the LPC ones you have on your hard drive, you can go to your system's root directory to find your files. To do this, follow these steps:
Right-click on the explorer area, and a context menu will appear, as shown in the following image. Select the "Go to root" option. This will take you to the root of your system, from where you can explore different directories.

Note: If you want to go back to the LPC sprites, use the "LPC resource" option from the context menu. The "Open resources" option opens the resources folder where the LPC spritesheets, _Edited, and _My_sprites folders are located.
How to edit a sprite's color?
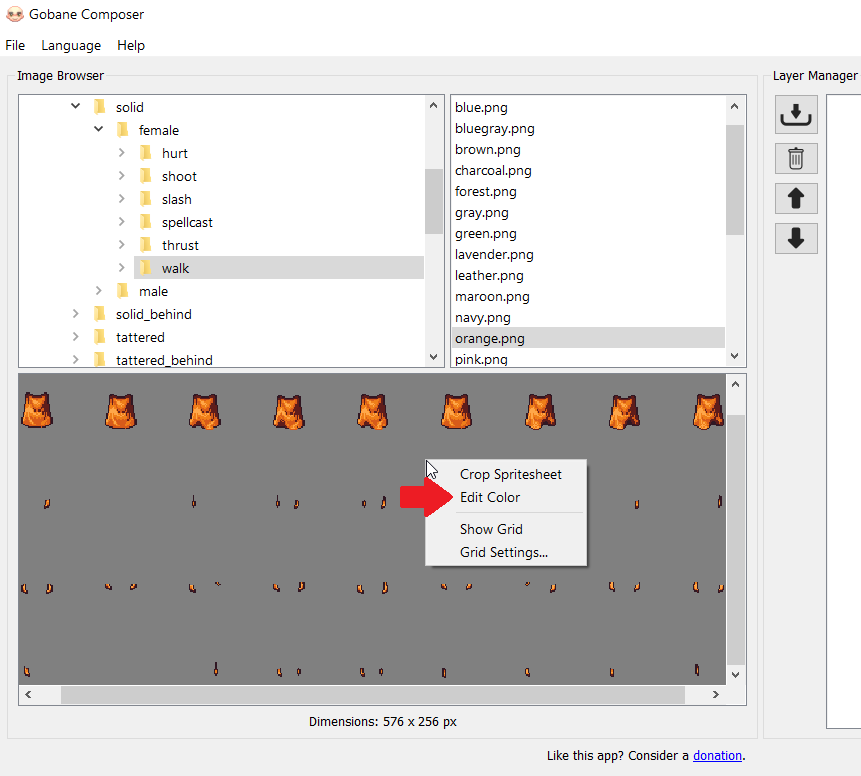
In case you need to adjust a sprite's color to be consistent with your game's palette, you can use the edit color tool. To do this, select a sprite to edit, then right-click, and a context menu will appear, as shown in the following image. Choose the "Edit color" option.
The following window will load with the necessary tools to change the sprite's color.
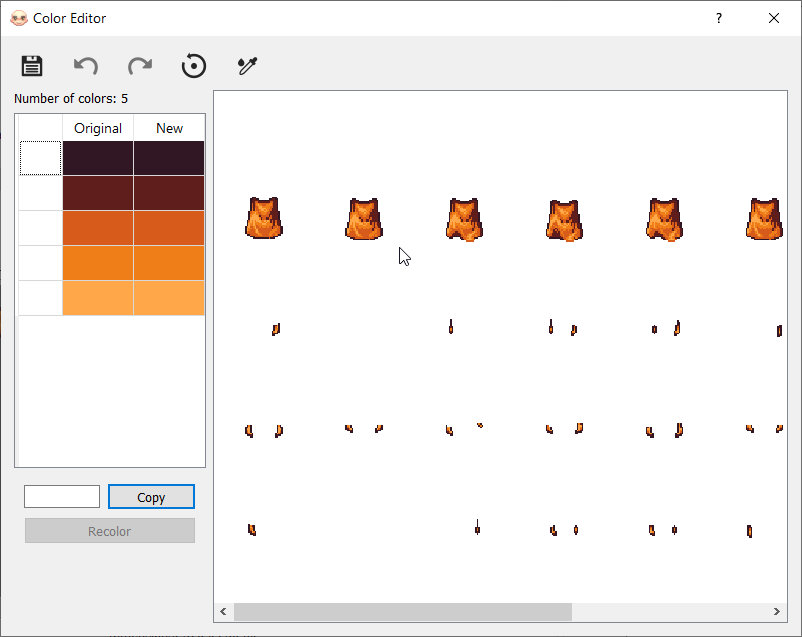
To change the color, select a color from the palette and then press the "recolor" button. Choose a color, and this will change the original color to the new color. Repeat the process for all the colors in the palette. Then, click the save icon to save the modified sprite. If you don't change the path, the modified sprites will be saved in the "_Edited" folder.
How to Crop a Sprite?
Sometimes you'll encounter gigantic sprites that contain various animation sequences. If you only need to use one sequence, you can use the crop tool. To do this, right-click on the image, and a context menu will appear. Select the "Crop Sprite sheet" option, as shown in the following image.
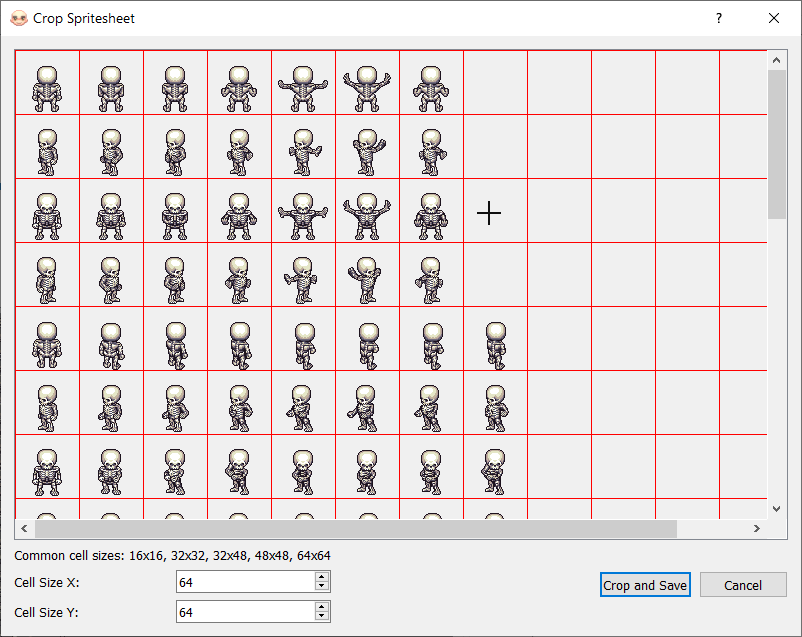
A window will open with the image and a grid. The first step is to configure the cell size for your sprite. Once the cells are correctly configured, you can drag your mouse pointer to select the area you want to crop. Finally, click the "crop and save" button.
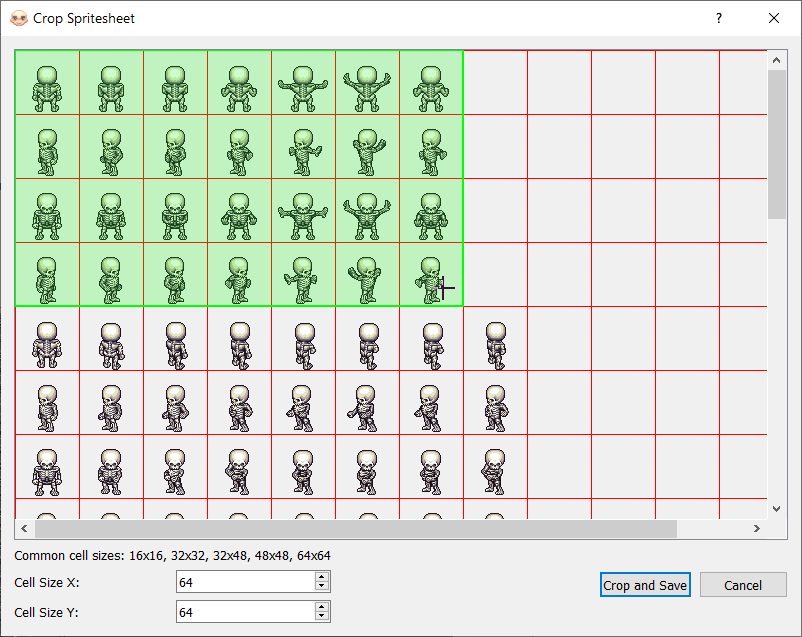
The cropped sprite will be saved by default in the "_Edited" folder.